Applications#
Applications main page#
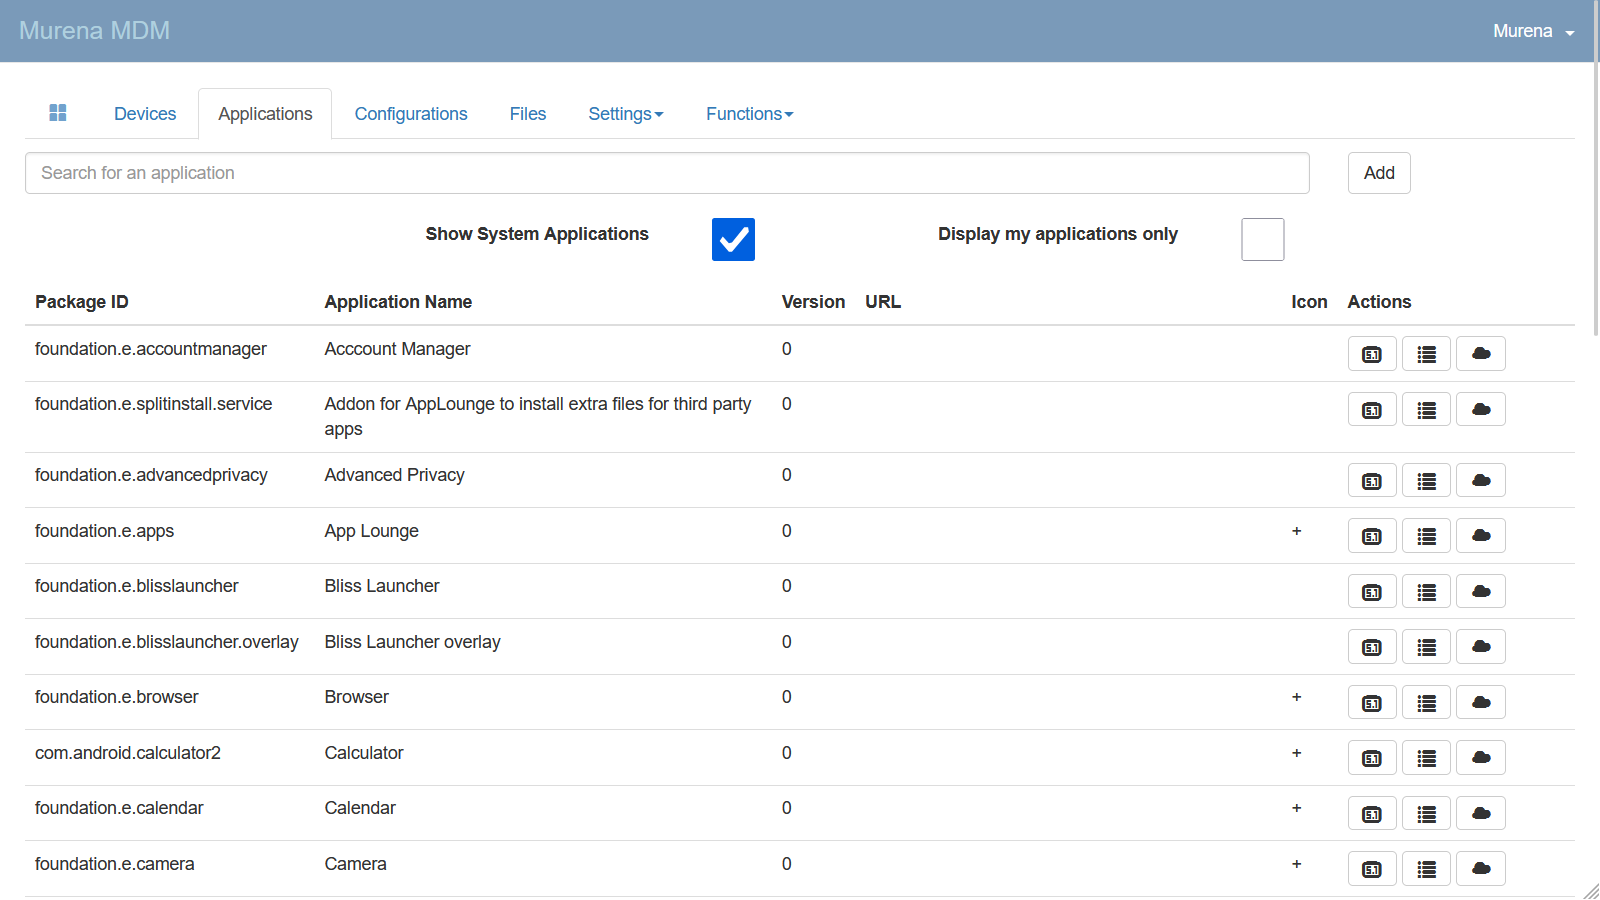
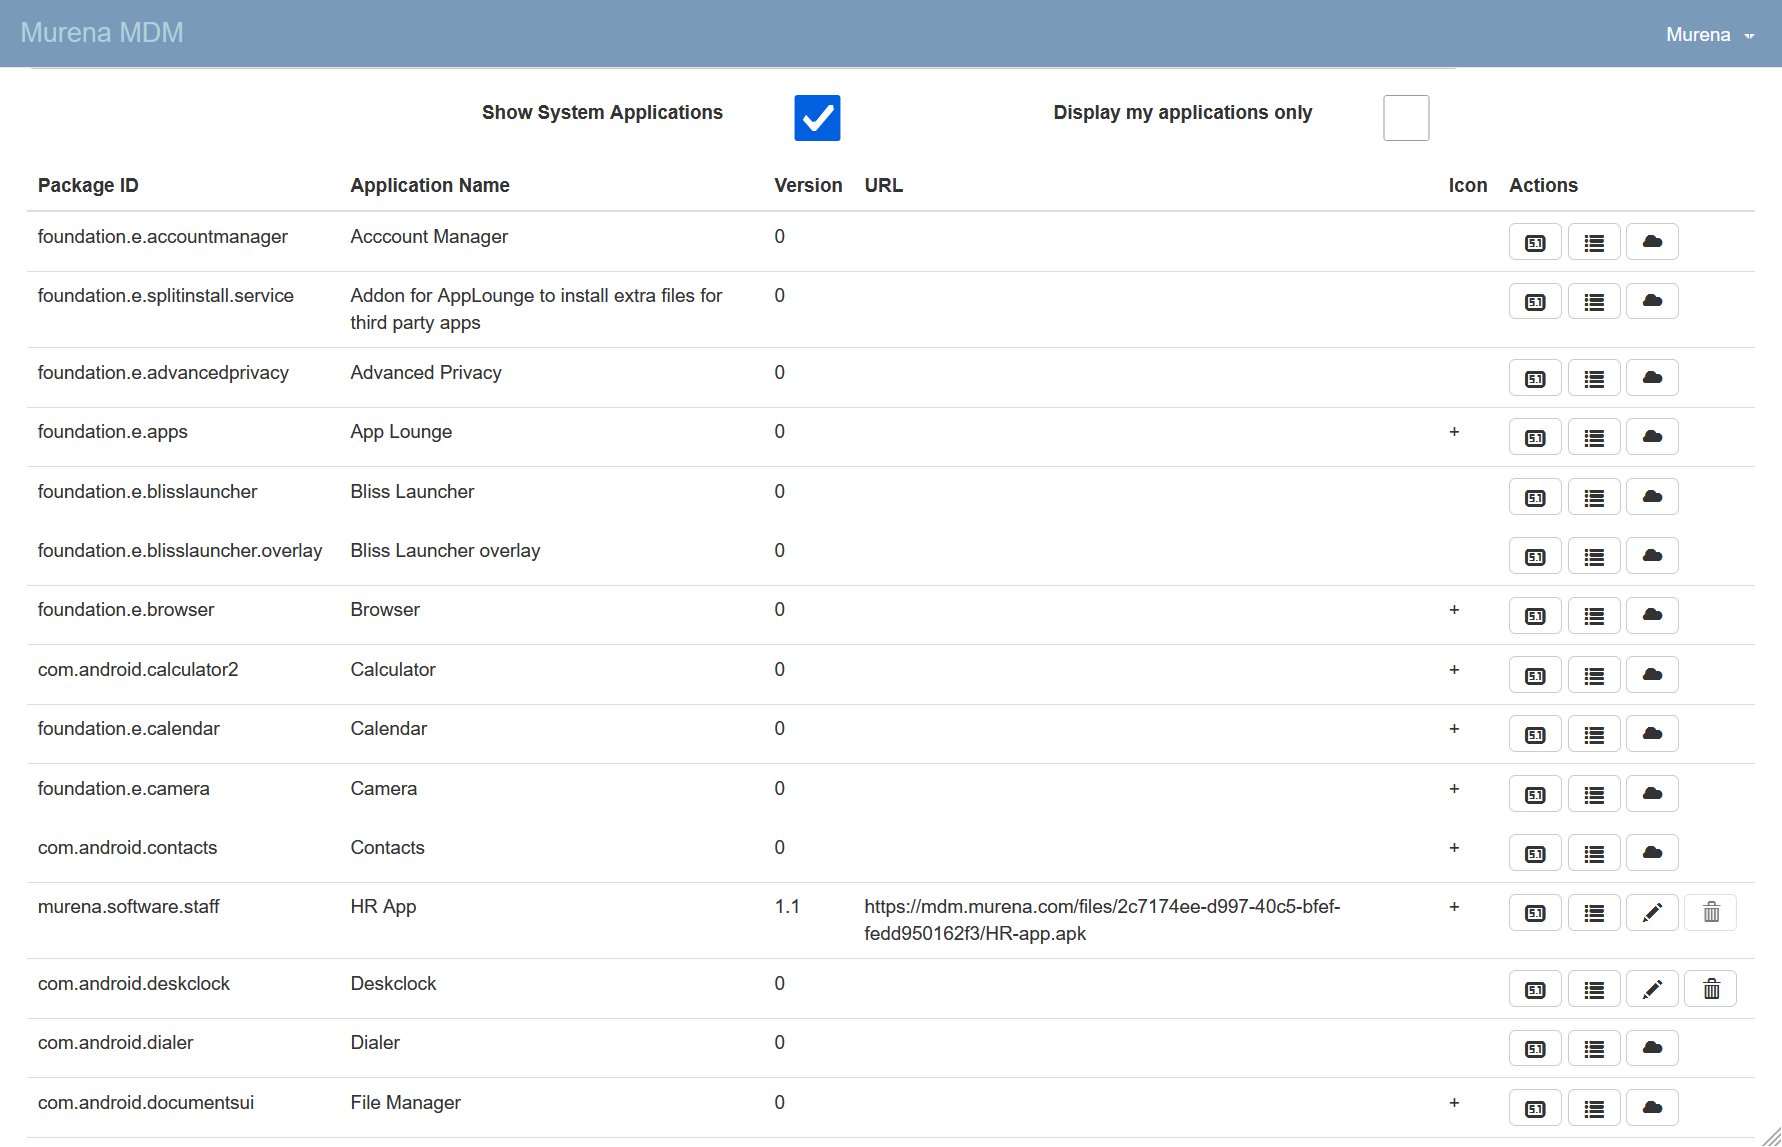
Navigate to the Applications tab. You'll see a list of core /e/OS system applications available on all /e/OS devices.
In the default (imported) configuration, all these applications are authorized.
Warning
Applications not on the list will be unusable. All applications are blacklisted by default until access is granted.
Edit access to an application#
Click on the icon ![]() in the application's actions to display a form that allows you to specify access in the context of your configuration.
in the application's actions to display a form that allows you to specify access in the context of your configuration.
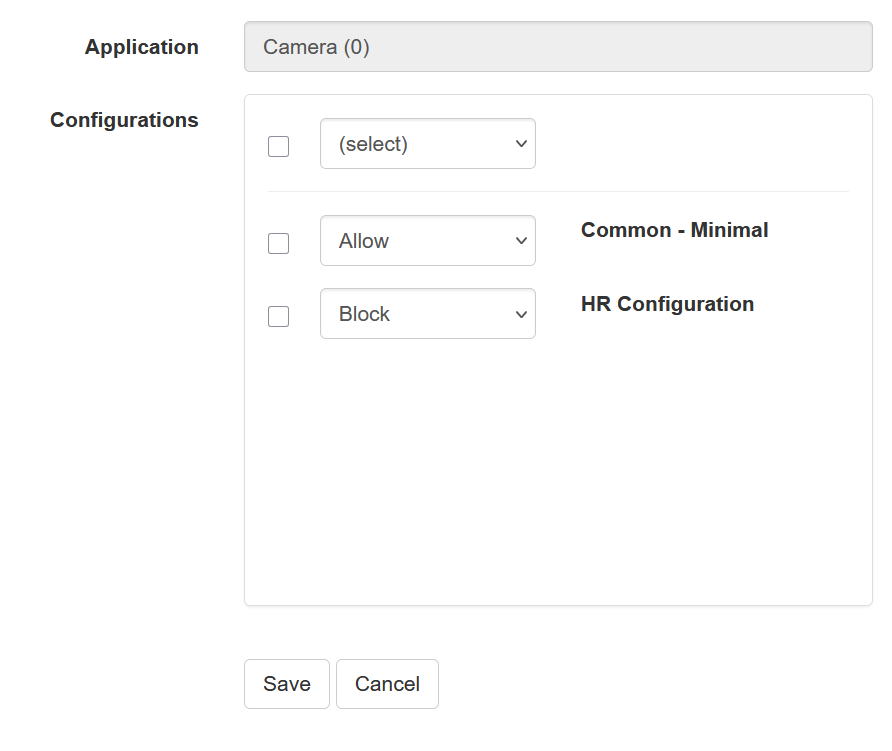
In this example, we're blocking access to the Camera application for devices using the RH configuration.
Tip
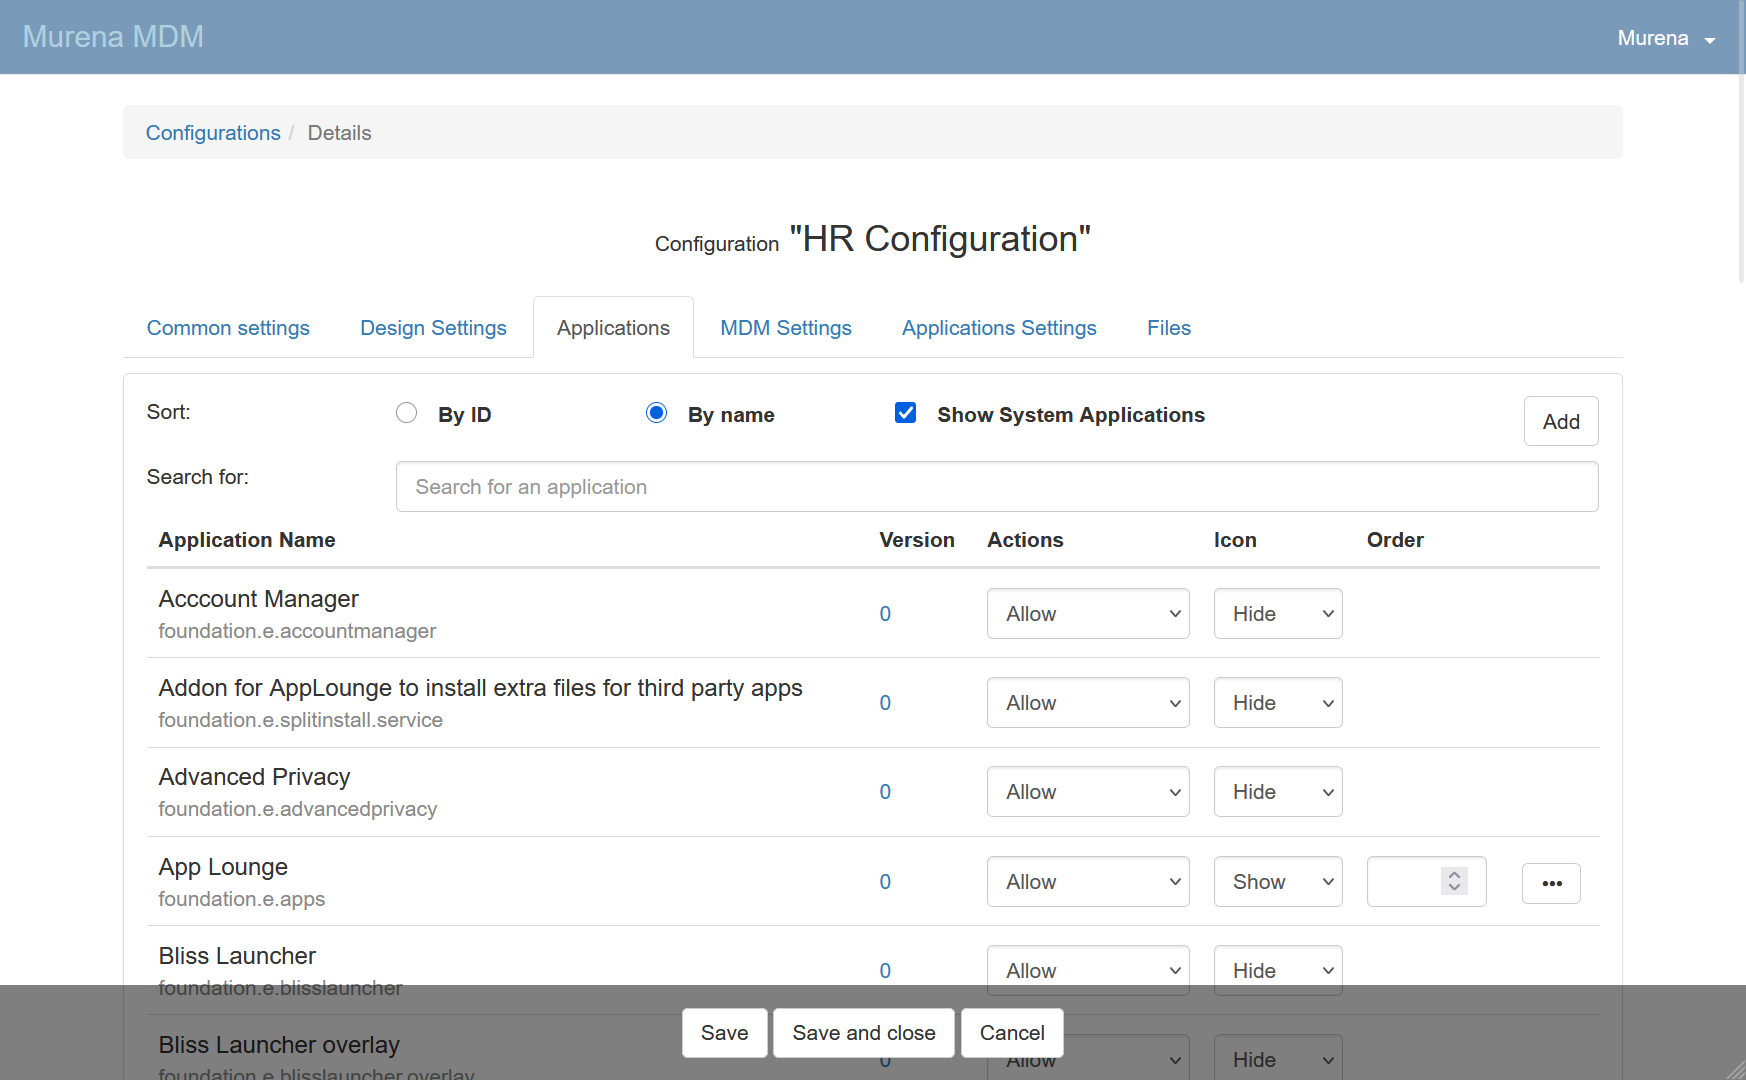
To be more efficient, you can edit application access permissions for all applications at once by going to
Configurations > Edit ![]() >
> Applications.
Deploy an application#
Your application must be available as an APK file.
On the Applications page, click Add to open the form.
Upload your APK in the File field; the form will be automatically populated.
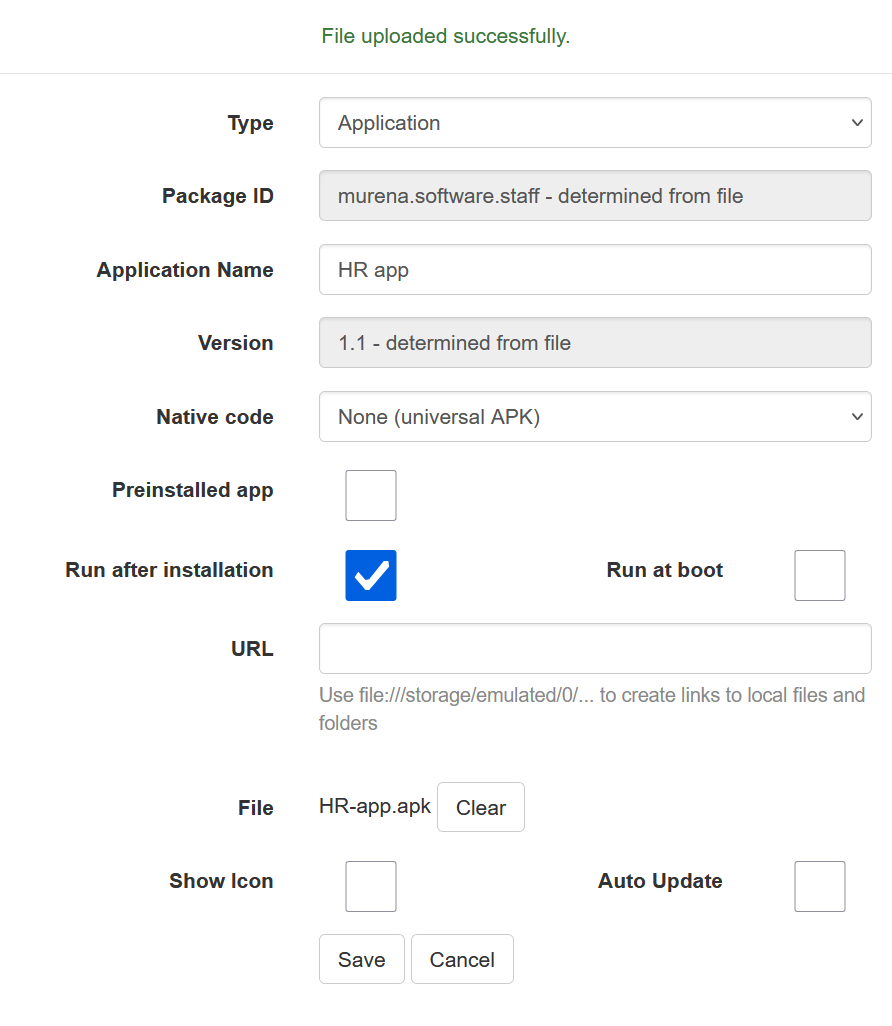
| Field | Description |
|---|---|
| Type | Application |
| Package ID | Automatically filled when you upload the APK |
| Application Name | Name displayed in the Murena MDM Console. The name shown in the app launcher will be taken from the application package |
| Version | Automatically filled when you upload the APK |
| Native code | None (Universal APK) |
| Preinstalled app | Marks the app as preinstalled (system app). Do not check for user-uploaded APKs. |
| Run after installation | Enable for apps requiring interactive actions, such as granting permissions on first launch. |
| Run at boot | Enable for apps that run background services after device boot. |
| URL | Automatically filled when you upload the APK |
| File | The APK file of your application |
| Show Icon | If checked, your app's icon will appear in the app launcher |
Choose a unique Application Name so you can find it easily in the web panel. Configure the Show icon checkbox and other optional parameters as needed, then click Save.
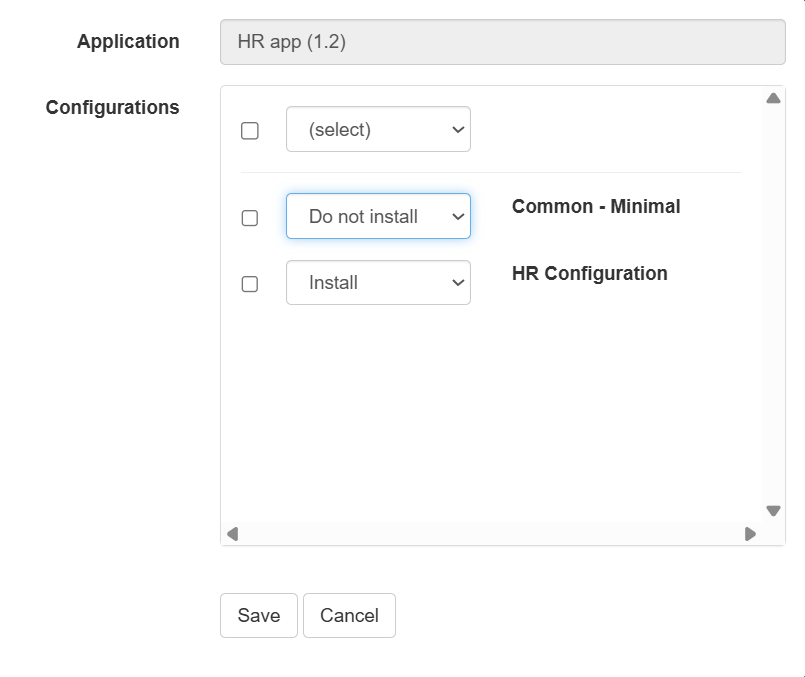
The console will display a list of configurations. For each configuration where you want to install the application, select Install, then click Save.
On the Devices page, targeted devices will show the status Installation in red.
The status will turn green once synchronization and installation are complete.

Manage multiple versions#
In the applications dashboard, click the version icon ![]() .
.
You'll be redirected to a list of versions of your application.
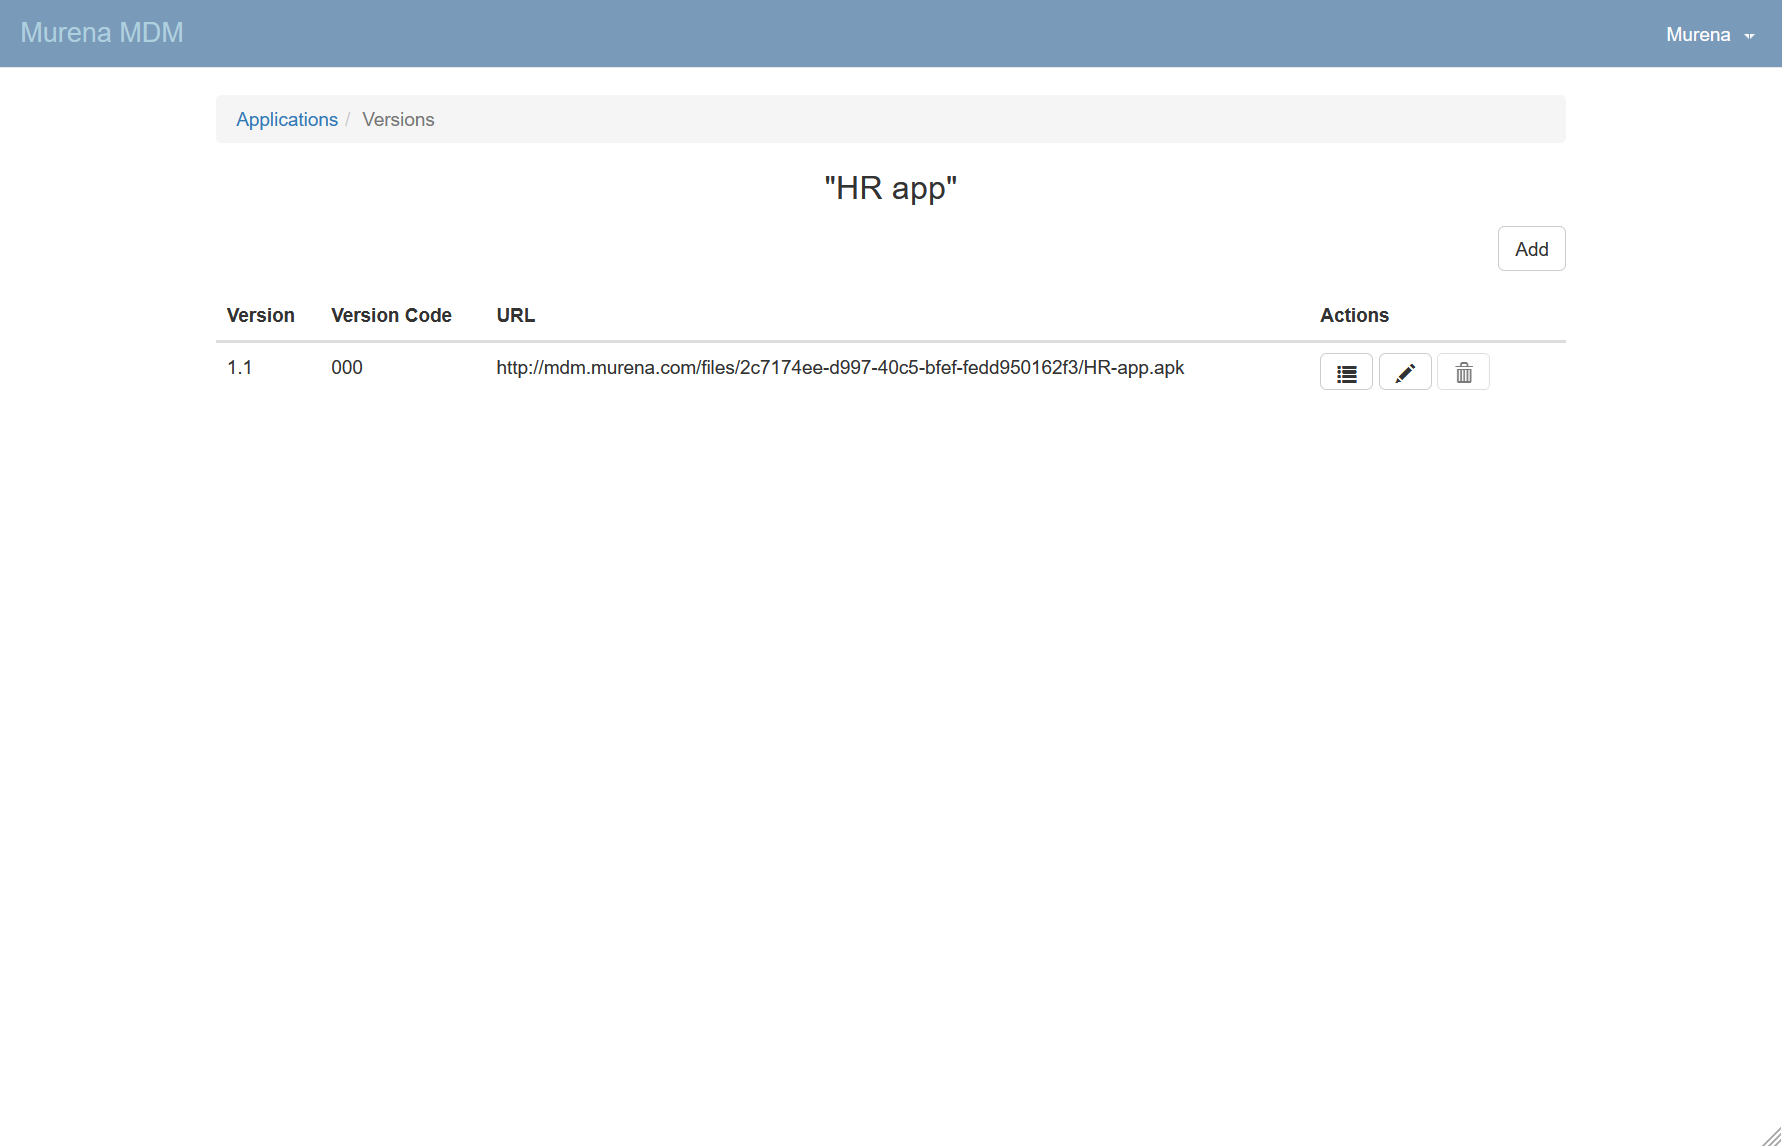
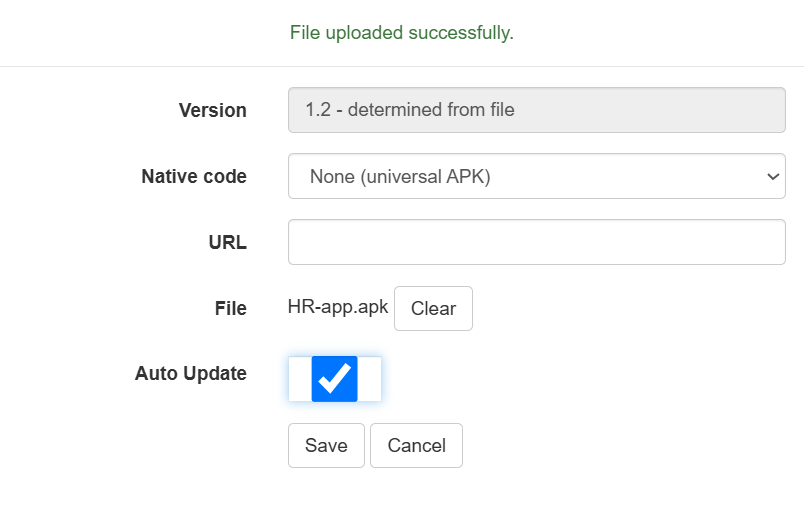
Click Add. A form similar to the one for a new application will appear. Upload the APK file of the new version first.
| Field | Description |
|---|---|
| Version | Automatically filled when you upload the APK |
| Native code | None (Universal APK) |
| URL | Automatically filled when you upload the APK |
| File | The APK file of your application |
| Auto Update | If checked, the application will be automatically updated on devices |
Once the form is completed, click Save. You'll be redirected to a list of configurations; select those where you want the new version installed.
If the new version is unstable, you can choose to install it only on a development/test configuration.
Tip
If the new version is unstable, you can install it on a configuration used for testing devices, while keeping official devices on the stable version.
Remove an application#
To remove an application, click the trashcan icon ![]() .
.

Info
If the trashcan icon is disabled ![]() , the application is still installed on one or more configurations and cannot be removed.
, the application is still installed on one or more configurations and cannot be removed.
To disable its installation:
- Click the edit icon
 to open the application settings.
 - Click
Configurationsto view the list of configurations. - For each configuration, set the application to
Do not install. - Click
Save.
After disabling installation, the trashcan icon ![]() will be enabled, allowing you to delete the application.
will be enabled, allowing you to delete the application.